Salesforce Marketing Cloud Event Streaming
Beta
This feature is in Closed Beta and is in active development. Contact your Amplitude support team for support with this integration.
About Salesforce Marketing Cloud
Salesforce Marketing Cloud provides marketing engagement automation that allows you to engage your users. Using this integration enables your marketing and growth teams to use behavioral data to better target campaigns and increase user engagement.
Considerations
Keep these things in mind when sending events to Salesforce Marketing Cloud:
- You must enable this integration in each Amplitude project you want to use it in.
- There are relevant limits for Salesforce Marketing Cloud events:
- Salesforce suggests not using more than 2500 calls per minutes when interacting with the REST API
- Yearly limit on API call
- Basic: 0 calls/year
- Pro: 2M calls/year
- Corporate: 6M calls/year
- Enterprise: 200M calls/year
Setup
Salesforce Marketing Cloud setup
You need a Client ID, Client Secret and Subdomain from Salesforce Marketing Cloud.
- In Salesforce Marketing Cloud, navigate to Setup under Settings.
- In the Quick Find box, search for Installed Packages.
- Click New to create a new package.
- Click Add Component.
- For the Component Type, select API Integration. This step generates the API integration information that is required in Amplitude.
- For the integration type, select Server-to-Server.
- Grant the package these permissions:
- Email: Read, Write
- Web: Read, Write
- Automation: Read, Write, Execute
- Journeys: Read
- List and Subscribers: Read, Write
- Tracking Events: Read
- Webhooks: Read, Write
- Save the package.
-
Copy the Client ID, Client Secret, and Subdomain from the app you want to integrate.
- For the Subdomain, see the Authentication Base URI and only copy the subdomain. e.g. If the Authentication Base URL is "https://mc1n78yx33kxv5mv1q7fh81flfjq.auth.marketingcloudapis.com/", then only copy "mc1n78yx33kxv5mv1q7fh81flfjq".
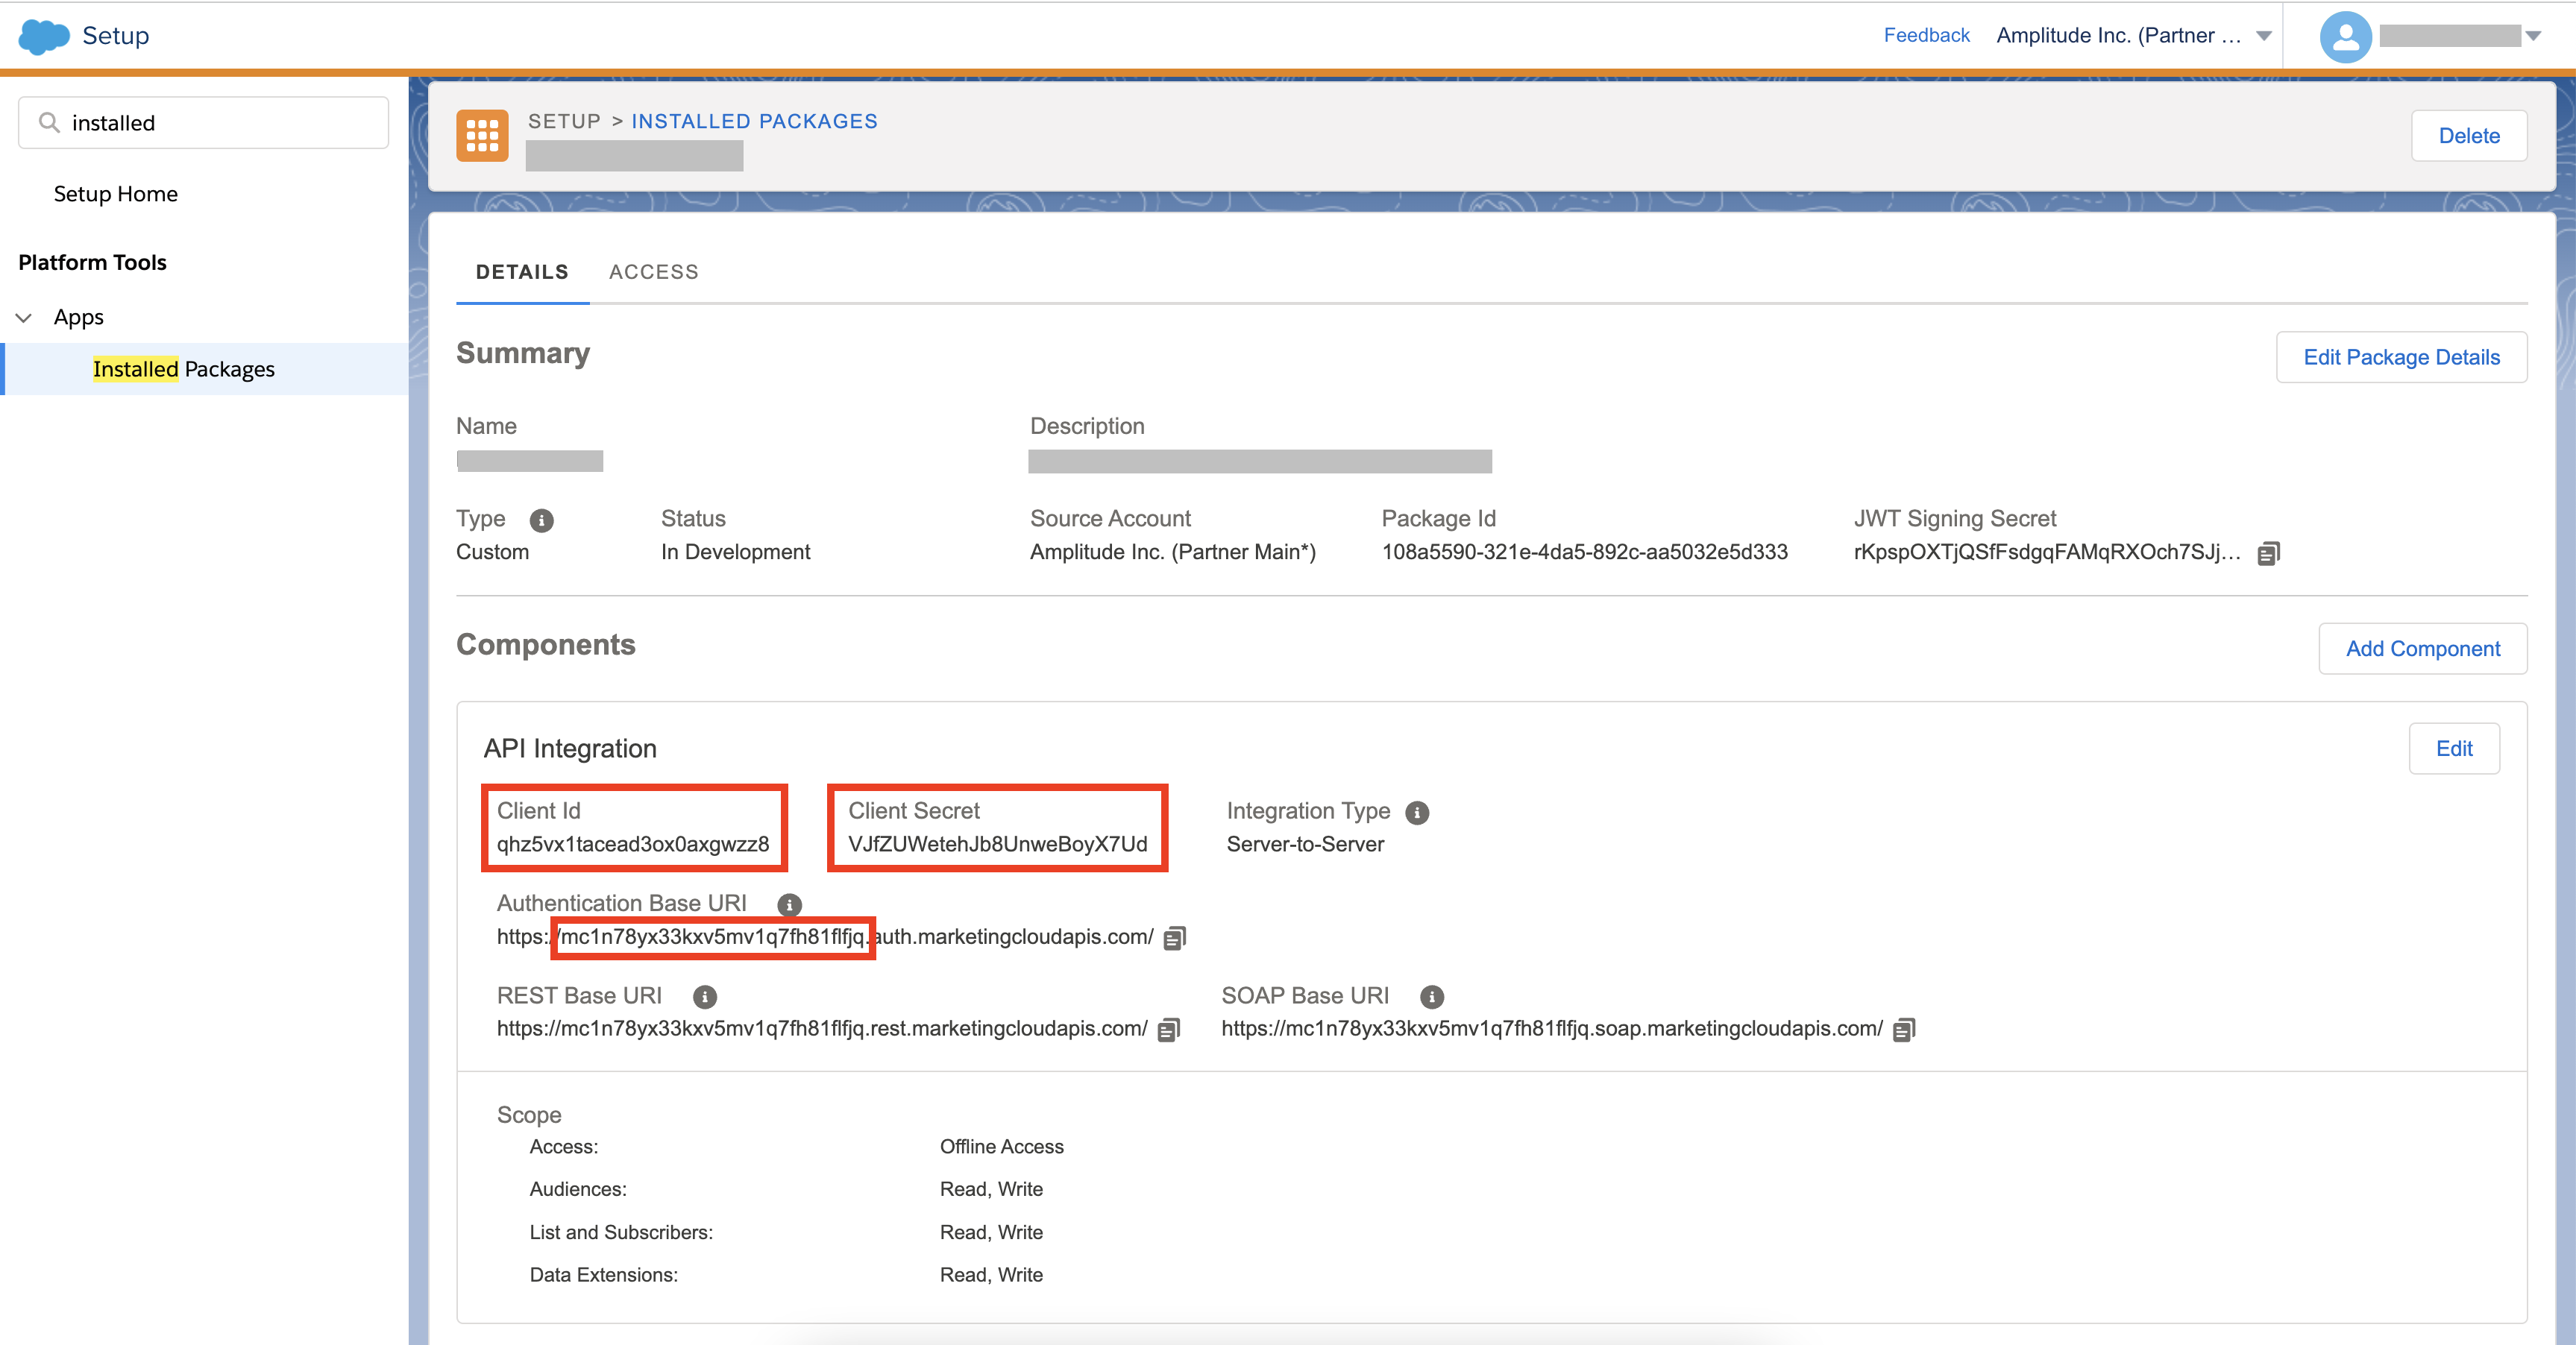
- For the Subdomain, see the Authentication Base URI and only copy the subdomain. e.g. If the Authentication Base URL is "https://mc1n78yx33kxv5mv1q7fh81flfjq.auth.marketingcloudapis.com/", then only copy "mc1n78yx33kxv5mv1q7fh81flfjq".
-
Click on the Access tab and click on Enable All Business Units.
Amplitude setup
- In Amplitude Data, click Catalog and select the Destinations tab.
- In the Event Streaming section, click Salesforce Marketing Cloud.
- Enter a sync name, then click Create Sync.
- Enter your Client ID / Client Secret / Subdomain created by SFMC.
- Enter your Event Definition Key generated by API Event in SFMC in the SFMC Event Definition Key field.
- Enter the External Key generated by the Data Extension for the user properties in SFMC to SFMC User Data Extension Key.
- Click on Map properties to destination to specify the identity mapping between Amplitude and SFMC. Note that SFMC requires the Contact Key and Email as properties.
- Toggle the Send Events filter to select the events to send. SFMC recommends choosing the events that are most important to your use case.
- Click on the Select & filter events option to choose the event type of the events you would like to send.
- (optional) In Select additional properties, select any more event properties you want to send to SFMC.
- Under Send Users, make sure the toggle is enabled ("Users are sent to SFMC") if you want to stream users and their properties to SFMC. By default, it sends the Contact key & Email address to SFMC.
- (optional) In Select additional properties, select any more user properties you want to send to SFMC. If you don't select any properties here, Amplitude doesn't send any.
Event forwarding setup (Optional)
Storing data in a different Data Extension in SFMC
Following these steps will enable you to create a Data Extension in Salesforce Marketing Cloud, set up an Event Definition, and configure the necessary mappings for forwarding events to Amplitude. You will have to go through these steps again if you do not want to store data in the same Data Extension.
- In Salesforce Marketing Cloud, navigate to Email Studio from the top navigation bar.
- Find the Data Extension section from the Subscribers.
- Create a Data Extension in any folder.
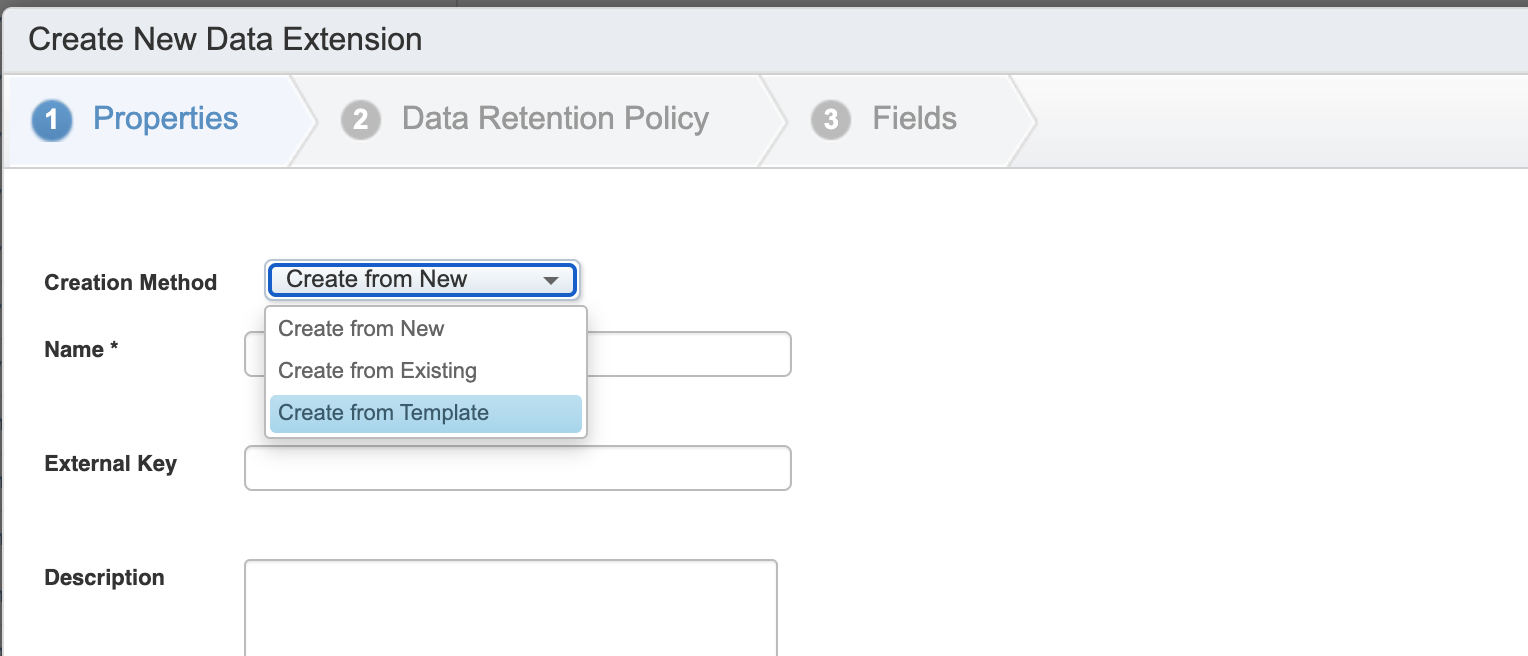
- (Recommendation) When you create a new Data Extension for event forwarding, use a template. Choose Create from Template in the Creation Method.
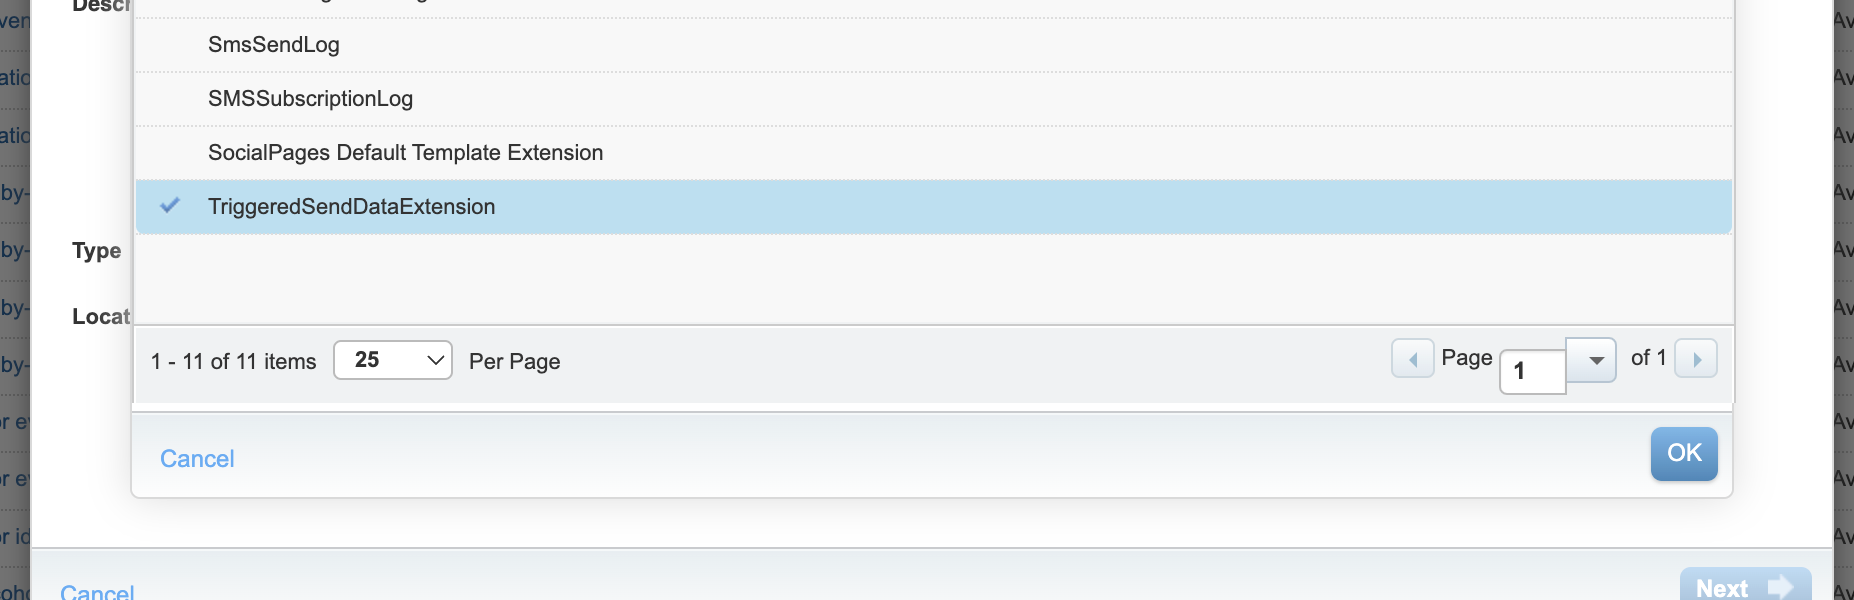
- Choose TriggeredSendDataExtension as the template.
- Make sure your Data Extension includes the columns SubscriberKey (to be used as Contact key) and EmailAddress (to be used as Email) for mapping properties in Amplitude's setup page.
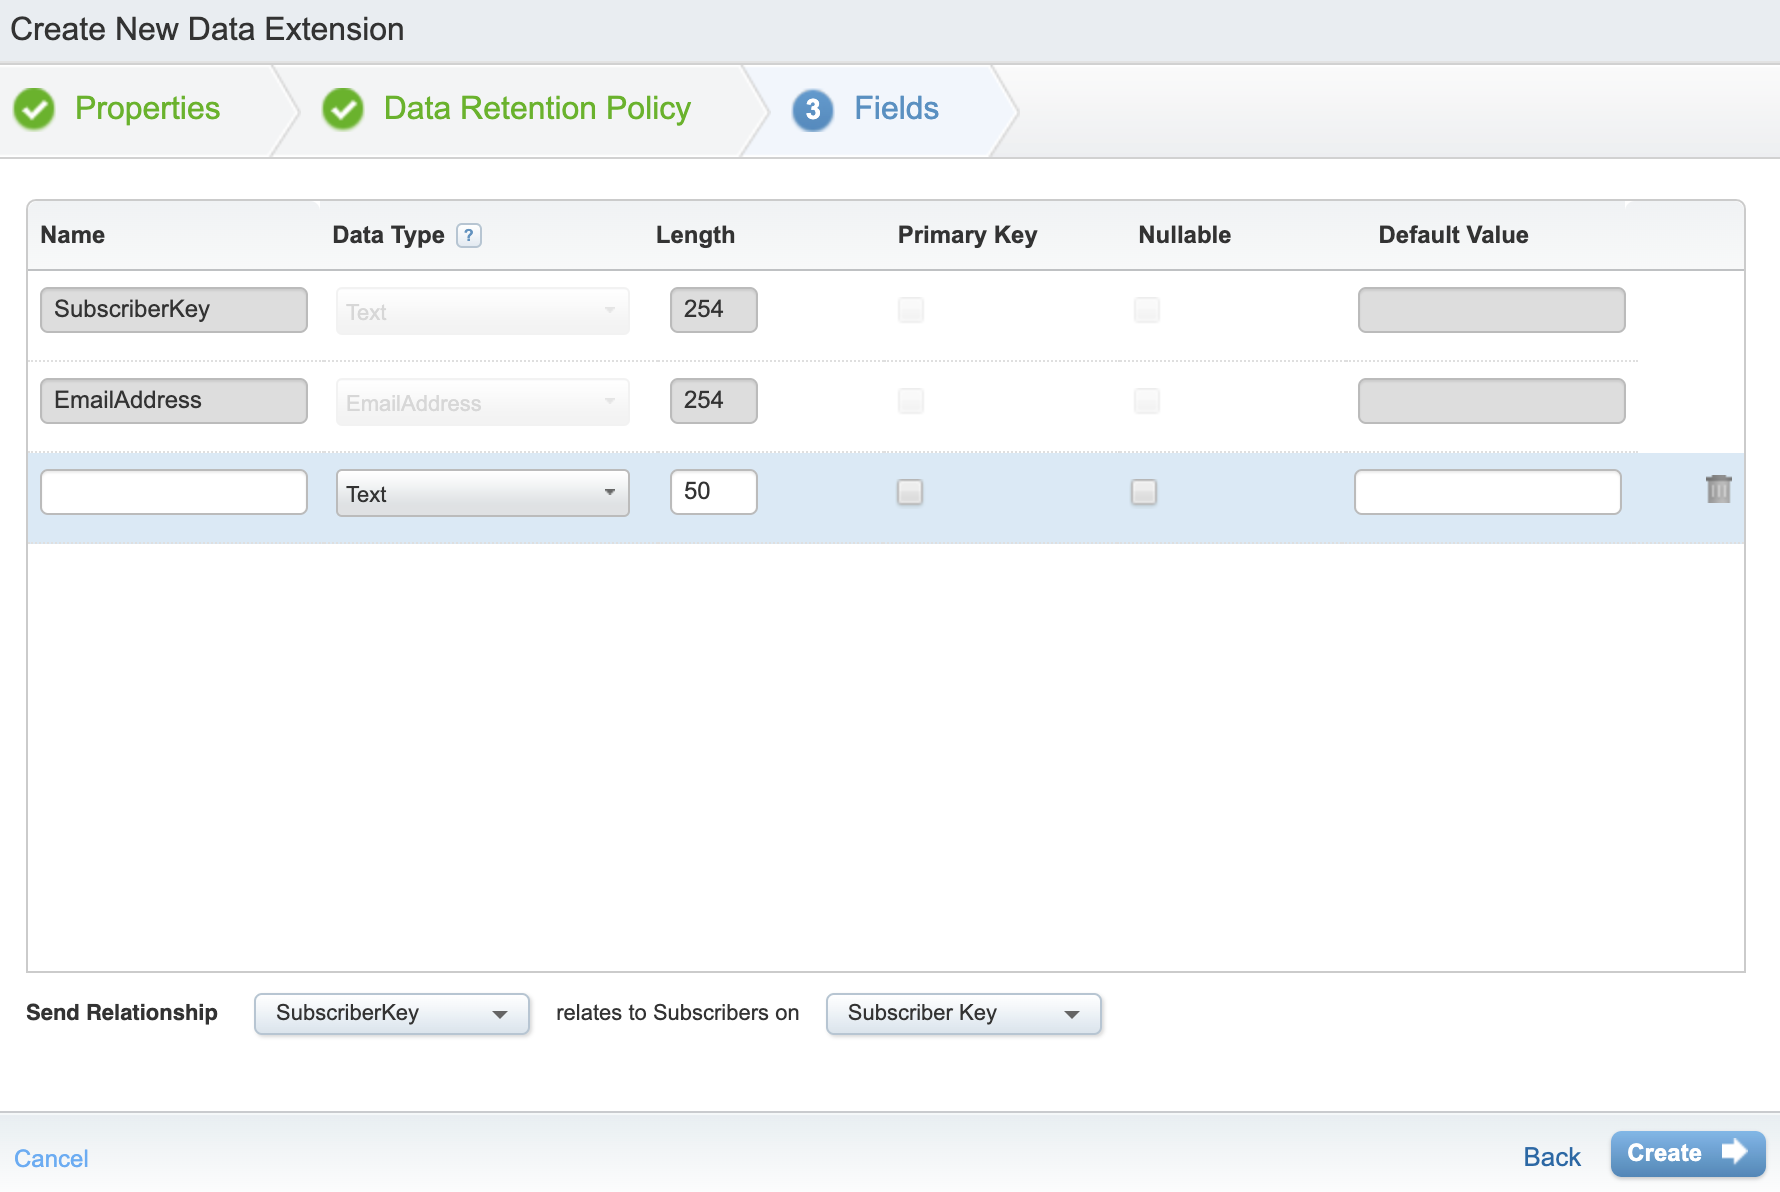
- For any additional columns you create (except SubscriberKey and EmailAddress), ensure their names match the properties you select in Amplitude's additional properties.
- By default, the event properties include event_type / event_time / SubscriberKey / EmailAddress.
- After you created the Data Extension, go to Journey Builder and find Event Sources under the Event tab.
- Click on New Event and select API Event for New Entry Sources.
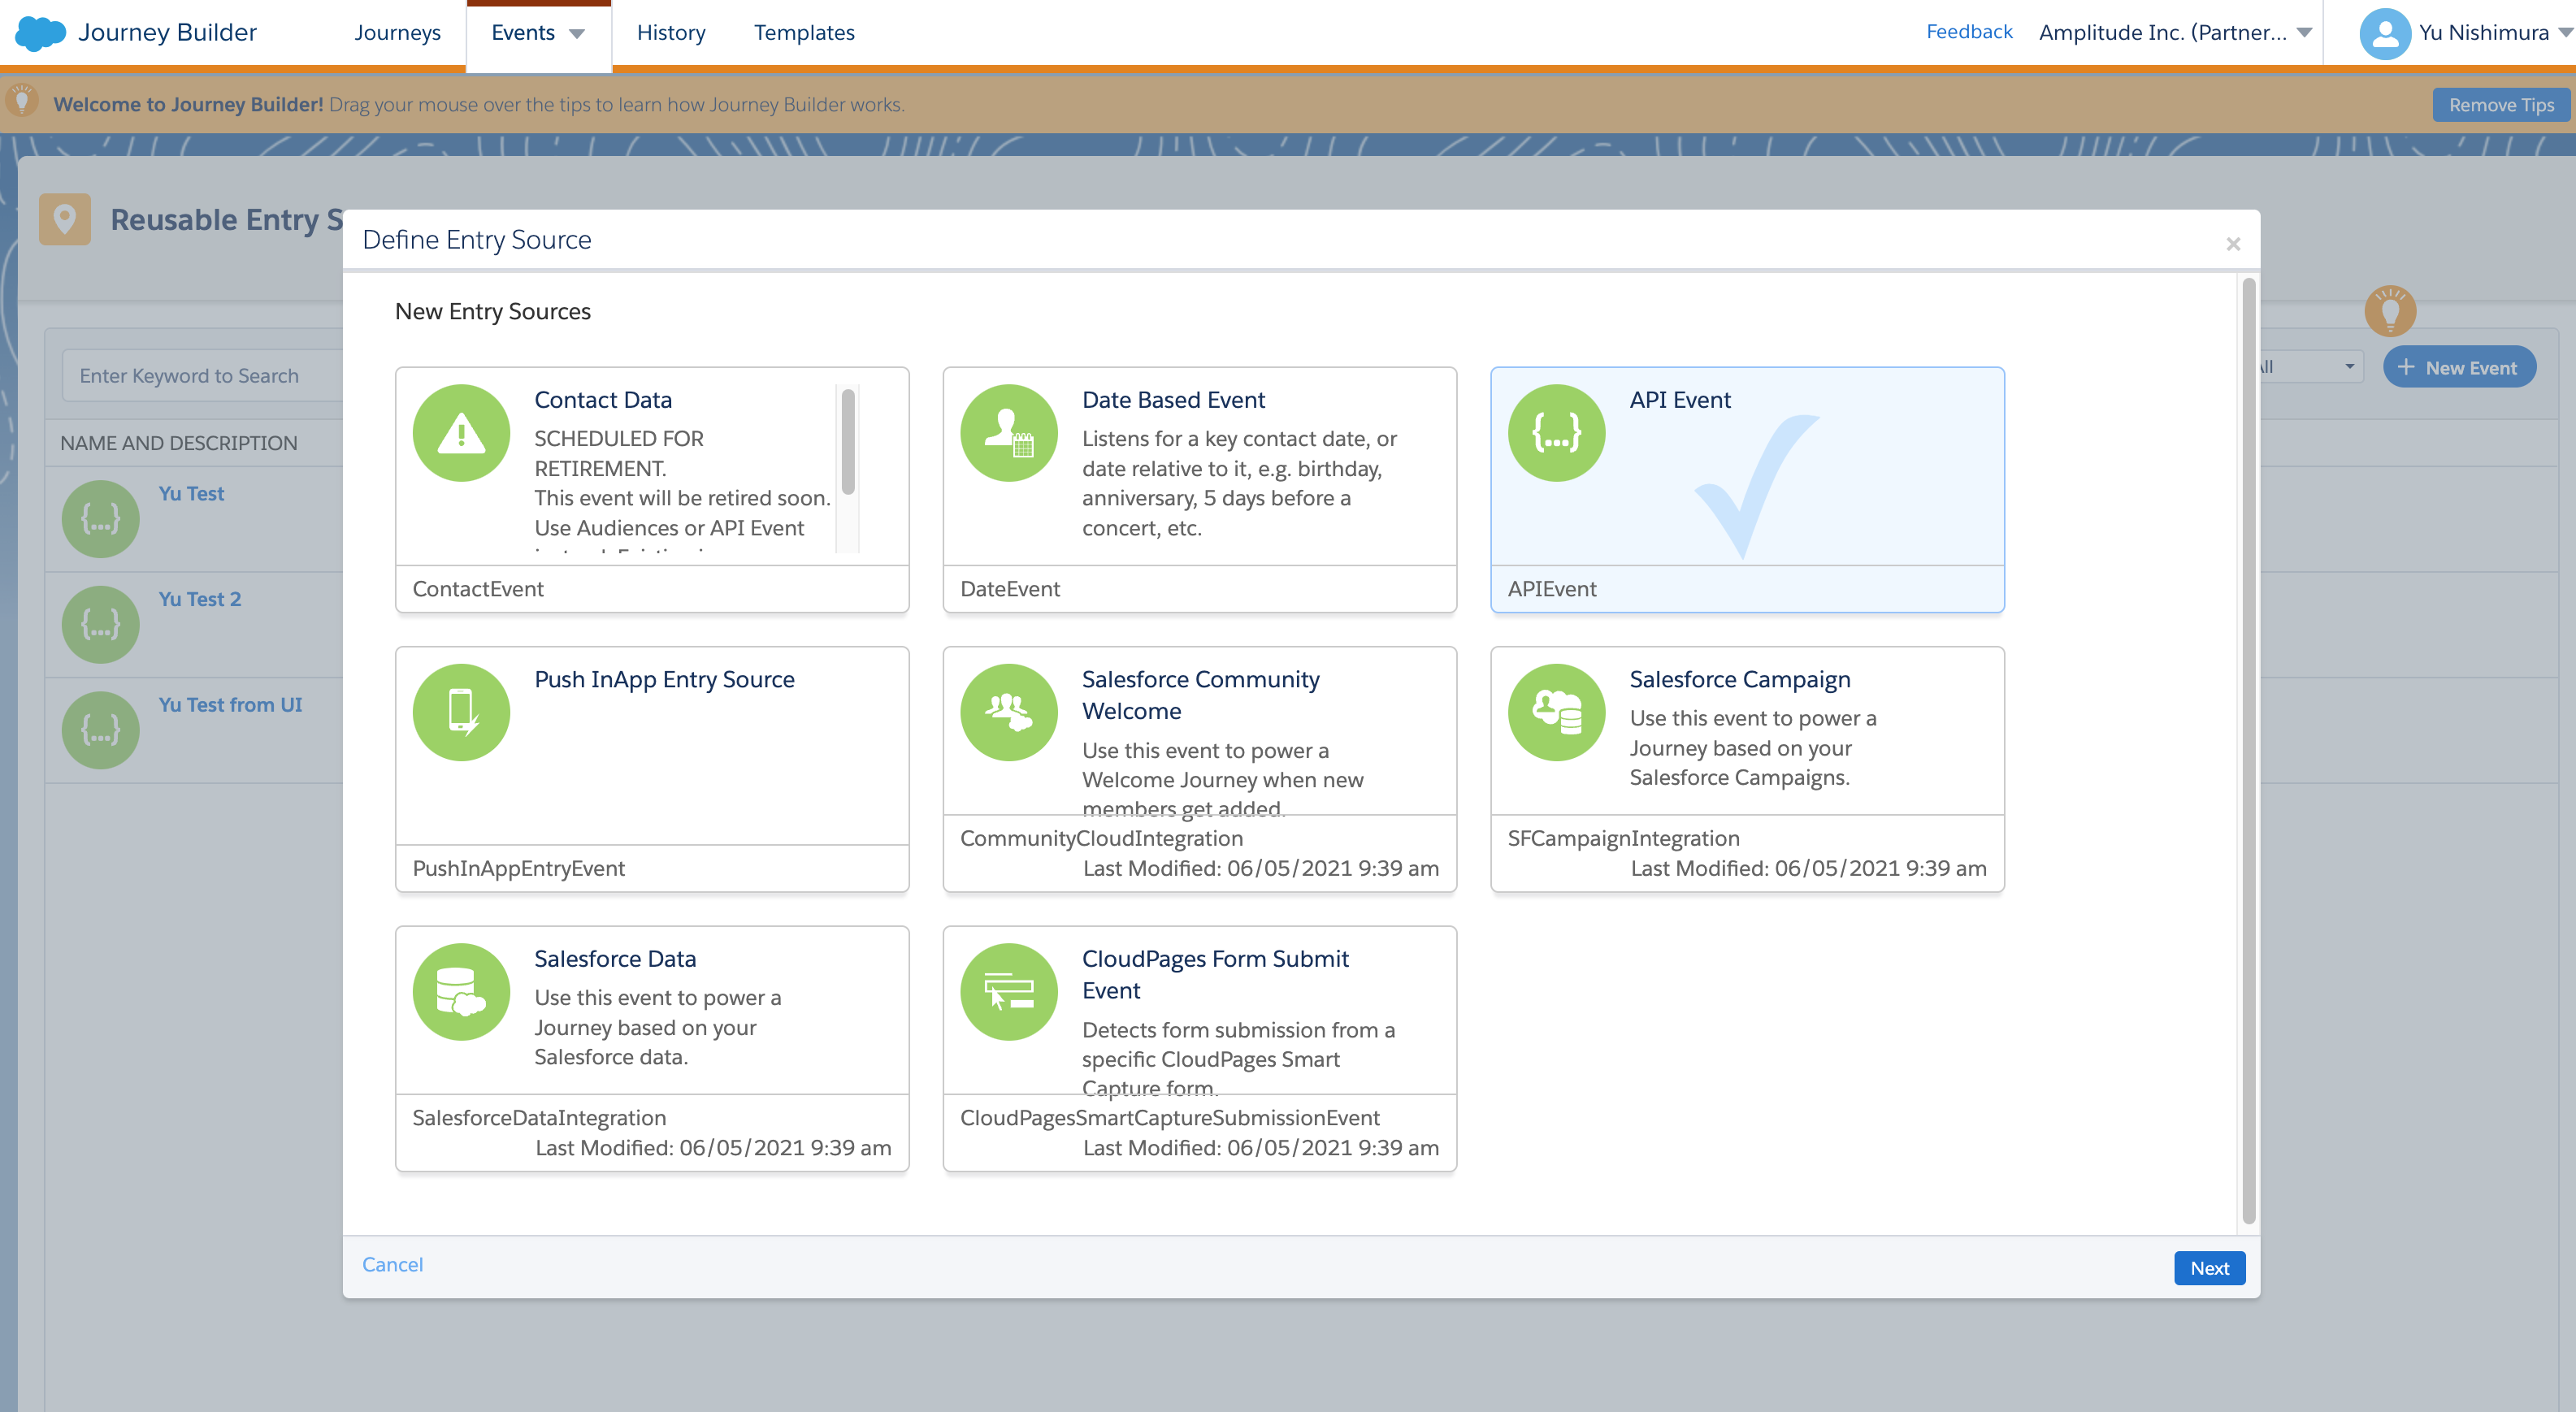
- Name your Event Definition and select the Data Extension you created.
- You can optionally create contact filters, which can be applied later.
- Copy the Event Definition Key and paste it into the SFMC Event Definition Key in Amplitude’s setup page.
- You are now ready to start forwarding the events.
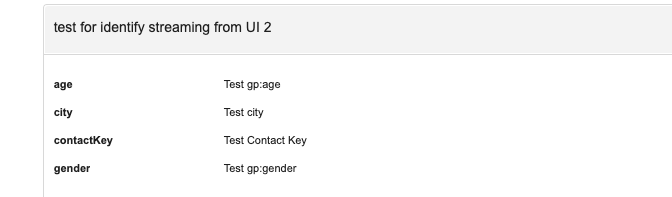
Identify forwarding setup (Optional)
Send other user properties than the default attributes in SFMC
You will have to define the Data Extension in SFMC to store the user properties that do not exist in the default attributes in SFMC. Default attribute set includes Contact Key and Email Address.
- To add your own attribute set, start by defining a Data Extension in SFMC.
- When creating the Data Extension, follow the specified naming format for Event Forwarding.
- Include a contactKey column in the Data Extension to map attributes to each contact in SFMC.
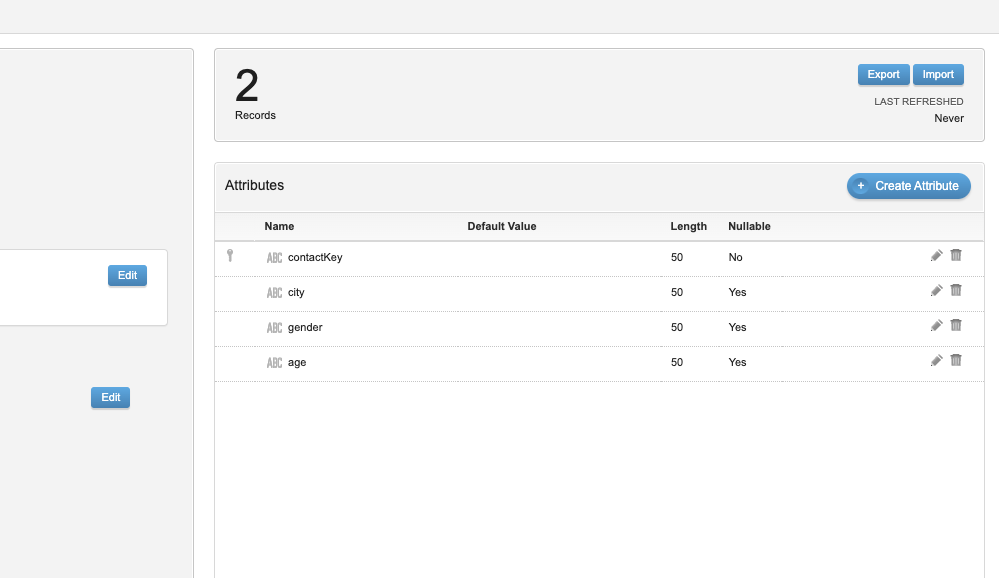 Note: Make sure that the contactKey column is set as a primary key.
 - After creating the Data Extension, navigate to the Data Designer tab in Contact Builder.
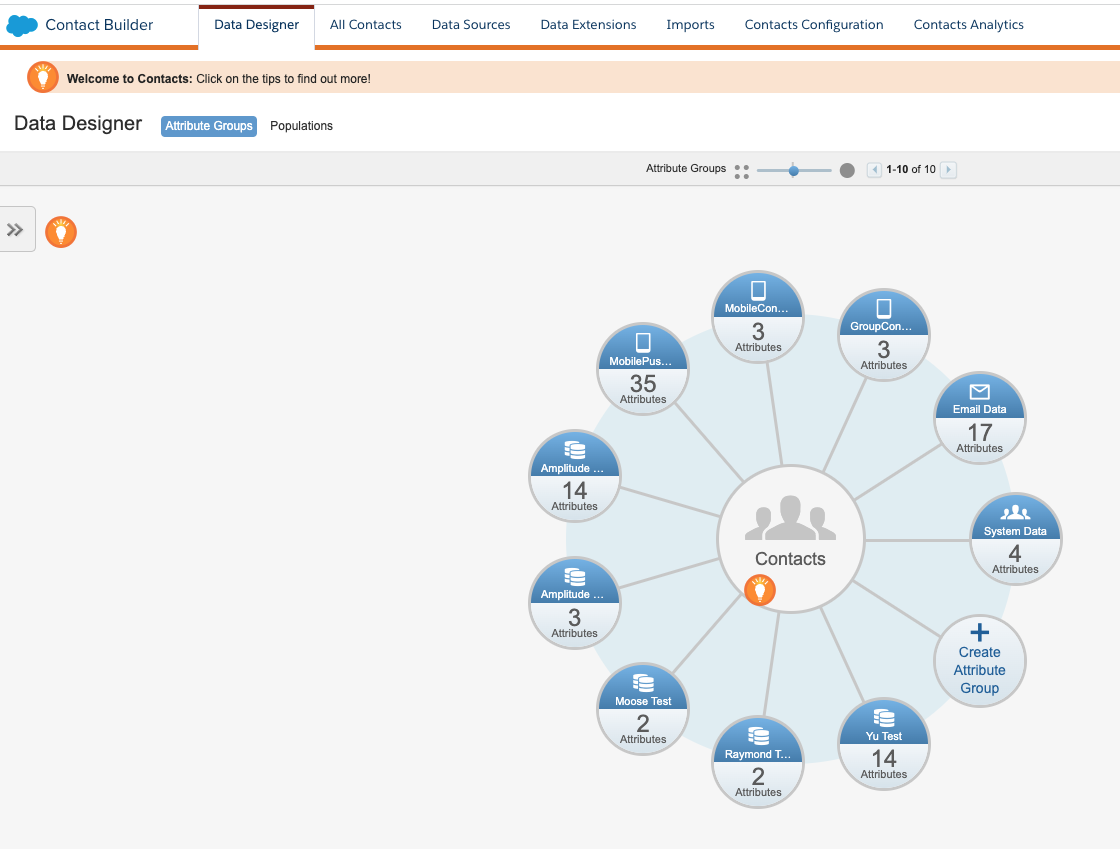
- Choose an Attribute Group and click on the Data Extensions button, then select Link.

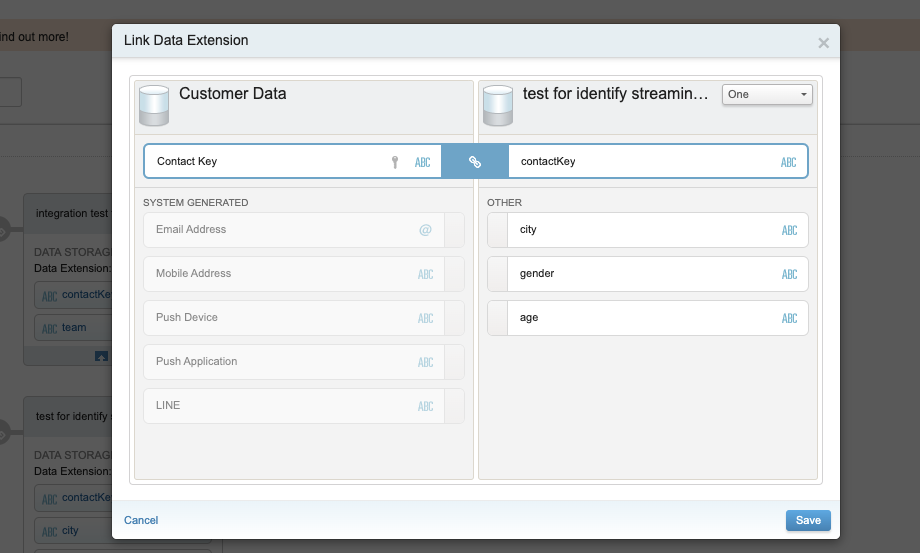
- Select your Data Extension and choose the column that maps to the Customer Data attribute. It is recommended to map the "contactKey" attribute to Contact Key in the Customer Data section.
- After you save, copy & paste the external key of the Data Extension into the SFMC User Data Extension Key in the setup UI of Amplitude.
- You are ready to send user properties! Your Data Extension is created and linked to the Attribute Group in Contact Builder, enabling you to store and utilize the attribute set for each contact in SFMC.
Use Cases
- Campaign Automation: Marketing Cloud’s Journey Builder is a campaign planning tool that enables you to design and automate campaigns that guide customers through their journey with a brand. Its foundation is the journey, which is the communication plan you design. Our events streaming will enable your Journey to be induced.
- Personalized Marketing: With the ability to track user behavior and capture user and event properties in Amplitude, you can build personalized contents and targeted marketing campaigns in Marketing Cloud. This can lead to increased engagement and customer loyalty.